Configuration
The configuration should be the following paths otherwise Rio will use the default configuration.
MacOS configuration file path is ~/.config/rio/config.toml.
Linux configuration file path is $XDG_CONFIG_HOME/rio/config.toml or ~/.config/rio/config.toml.
Windows configuration file path is %USERPROFILE%\AppData\Local\rio\config.toml or $env:USERPROFILE\AppData\Local\rio\config.toml(PowerShell).
You can also set a custom config path by using the $RIO_CONFIG_HOME env var. It will be used as a replacement
for ~/.config/rio reading configs, themes...
Updates to the configuration file automatically triggers Rio to render the terminal with the new configuration.
Note that all parameters without a header must be at the beginning of the file, otherwise they will be ignored. Example:
[editor]
program = "vi"
args = []

theme = "dracula" # won't work, because it's under the `editor` header
theme = "dracula" # will work

[editor]
program = "vi"
args = []
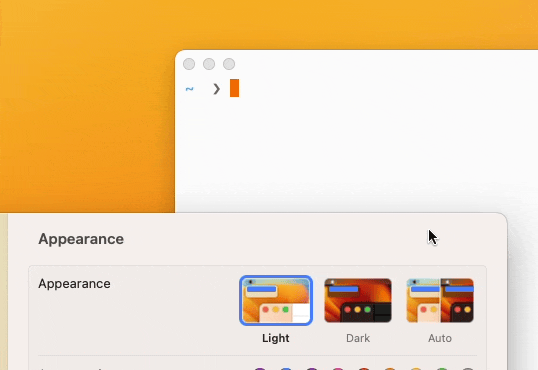
adaptive-theme
Rio supports adaptive themes that automatically switch between light and dark themes based on the system theme. This feature works on Web, macOS, Windows, and Linux (Wayland and X11, via the XDG Desktop Portal) platforms.
[adaptive-theme]
light = "belafonte-day"
dark = "belafonte-night"
When configured, Rio will automatically switch between the specified light and dark themes based on your system's current theme setting.
force-theme
When using adaptive themes, you can override the system theme by forcing Rio to use a specific theme regardless of the system appearance.
force-theme = "dark"
Accepted values: "dark" or "light". When not set, Rio follows the system theme.
You can also toggle the appearance theme at runtime using the ToggleAppearanceTheme key binding action or through the command palette.
colors
Defining colors in the configuration file will not have any effect if you're using a theme.
The default configuration is without a theme.
Example:
[colors]
# Regular colors
background = '#0F0D0E'
black = '#4C4345'
blue = '#006EE6'
cyan = '#88DAF2'
foreground  = '#F9F4DA'
green = '#0BA95B'
magenta = '#7B5EA7'
red = '#ED203D'
white = '#F1F1F1'
yellow = '#FCBA28'

# Cursor
cursor = '#F712FF'
vi-cursor = '#12d0ff'

# Navigation
tabs = '#cccccc'  # Inactive tab text and border color
tabs-active = '#ffffff'  # Active tab text color
bar = '#1b1a1a'
split = '#292527'

# Search
search-match-background = '#44C9F0'
search-match-foreground = '#FFFFFF'
search-focused-match-background = '#E6A003'
search-focused-match-foreground = '#FFFFFF'

# Hints
hint-foreground = '#181818'
hint-background = '#f4bf75'

# Selection`
selection-foreground = '#0F0D0E'
selection-background = '#44C9F0'

# Dim colors
dim-black = '#1C191A'
dim-blue = '#0E91B7'
dim-cyan = '#93D4E7'
dim-foreground = '#ECDC8A'
dim-green = '#098749'
dim-magenta = '#624A87'
dim-red = '#C7102A'
dim-white = '#C1C1C1'
dim-yellow = '#E6A003'

# Light colors
light-black = '#ADA8A0'
light-blue = '#44C9F0'
light-cyan = '#7BE1FF'
light-foreground = '#F2EFE2'
light-green = '#0ED372'
light-magenta = '#9E88BE'
light-red = '#F25E73'
light-white = '#FFFFFF'
light-yellow = '#FDF170'
You can also specify RGBA with hex, for example: #43ff64d9.
confirm-before-quit
Require confirmation before quitting (Default: true).
confirm-before-quit = true
copy-on-select
Automatically copy the selected text to the clipboard when a mouse selection ends. Disabled by default.
This is a top-level option — it must appear before any [section] header in your config file.
copy-on-select = true
cursor
By default, the cursor shape is set to block. You can also choose from other options like underline and beam.
Additionally, you can enable or disable cursor blinking, which is set to false by default.
Shape
Options: 'block', 'underline', 'beam'
[cursor]
shape = 'block'
Blinking
Enable/disable blinking (default: false)
[cursor]
blinking = false
Blinking-interval
Set cursor blinking interval (default: 800, only configurable from 350ms to 1200ms).
[cursor]
blinking-interval = 800
bell
Configure the terminal bell behavior. The bell can be triggered by applications using the BEL control character (ASCII 7).
Visual
Enable or disable the visual bell. When enabled, the screen will flash instead of playing a sound.
Default is false.
[bell]
visual = false
Audio
Enable or disable the audio bell. When enabled, a sound will play when the bell is triggered.
Default behavior:
- macOS:
true(uses system notification sound) - Windows:
true(uses system notification sound) - Linux/BSD:
false(requiresaudiofeature during compilation)
[bell]
audio = true
On Linux and BSD systems, audio bell support requires Rio to be compiled with the audio feature flag. Distribution packages typically don't include this feature to minimize dependencies. See Build from source for compilation instructions with audio support.
developer
This property enables log level filter and file. The default level is "OFF" and the logs are not logged to a file as default. The level may be DEBUG, INFO, TRACE, ERROR, WARN or OFF.
[developer]
log-level = "OFF"
enable-log-file = false
The default log file is located at ~/.config/rio/log/rio.log.
If you have any suggestion of configuration ideas to Rio, please feel free to open an issue.
draw-bold-text-with-light-colors
Default is false
draw-bold-text-with-light-colors = false
editor
This setting specifies the editor Rio will use to open the configuration file. By default, the editor is set to vi.
Whenever the key binding OpenConfigEditor is triggered, Rio will use the configured editor and the path to the Rio configuration file.
For example, if you have VS Code installed and want to use it as your editor, the configuration would look like this:
[editor]
program = "code"
args = []
When OpenConfigEditor is triggered, it will execute the command:
$ code <path-to-rio-configuration-file>.
If you set a value for program, Rio will look for it in the default system application directory (/usr/bin on Linux and macOS). If your desired editor is not in this directory, you must specify its full path:
[editor]
program = "/usr/local/bin/code"
args = []
effects
Configure visual effects for the terminal.
custom-mouse-cursor: Enables a custom mouse cursor effect. Default:falsetrail-cursor: Enables a smooth trail animation when the terminal cursor moves, using spring physics for natural motion. Default:false
[effects]
custom-mouse-cursor = true
trail-cursor = true

env-vars
Sets environment variables.
Example:
env-vars = ["FIRST_VARIABLE_NAME=123", "SECOND_VARIABLE_NAME=456"]
fonts
The font configuration default:
[fonts]
size = 14
features = []
use-drawable-chars = true
symbol-map = []
disable-warnings-not-found = false
additional-dirs = []

[fonts.regular]
family = "cascadiacode"
style = "default"

[fonts.bold]
family = "cascadiacode"
style = "default"

[fonts.italic]
family = "cascadiacode"
style = "default"

[fonts.bold-italic]
family = "cascadiacode"
style = "default"
Each per-slot style accepts "default" (let font discovery pick using slot-implied bold/italic traits), false (disable this style — fall back to the regular face), or a face style name like "Light", "Medium", "Bold", "Heavy".
fonts.disable-warnings-not-found
Disables warnings regarding fonts not found. Default it false.
fonts.disable-warnings-not-found = false
fonts.family
Note: You can set different font families but Rio terminal will always look for regular font bounds whene
You can also set family on root to overwrite all fonts.
fonts.family = "cascadiacode"
fonts.features
In case you want to specify any font feature:
fonts.features = ["ss02", "ss03", "ss05", "ss19"]
Note: Font features do not have support to live reload on configuration, so to reflect your changes, you will need to close and reopen Rio.
fonts.hinting
Enable or disable font hinting. It is enabled by default.
fonts.hinting = true
fonts.symbol-map
Has no default values. Example values are shown below:
fonts.symbol-map = [
  # covers: '⊗','⊘','⊙'
  { start = "2297", end = "2299", font-family = "Cascadia Code NF" }
]
Map the specified Unicode codepoints to a particular font. Useful if you need special rendering for some symbols, such as for Powerline. Avoids the need for patched fonts.
In case you would like to map many codepoints:
fonts.symbol-map = [
  { start = "E0A0", end = "E0A3", font-family = "PowerlineSymbols" },
  { start = "E0C0", end = "E0C7", font-family = "PowerlineSymbols" }
]
fonts.use-drawable-chars
When set true, Rio terminal will use built-in draw system for specific set of characters (including box drawing characters (Unicode points U+2500 - U+259F), legacy computing symbols (U+1FB00 - U+1FB3B), and powerline symbols (U+E0B0 - U+E0BF)).
fonts.use-drawable-chars = true
The list of characters
─Horizontal═DoubleHorizontal│Vertical║DoubleVertical━HeavyHorizontal┃HeavyVertical└TopRight┘TopLeft┌BottomRight┐BottomLeft┼Cross├VerticalRight┤VerticalLeft┬HorizontalDown┴HorizontalUp╥DownDoubleAndHorizontalSingle╤DownSingleAndHorizontalDouble╘UpSingleAndRightDouble╛UpSingleAndLeftDouble╪VerticalSingleAndHorizontalDouble╚DoubleUpAndRight╝DoubleUpAndLeft╯ArcTopLeft╭ArcBottomRight╮ArcBottomLeft╰ArcTopRight▂LowerOneQuarterBlock▁LowerOneEighthBlock▃LowerThreeEighthsBlock▎LeftOneQuarterBlock▍LeftThreeEighthsBlock▊LeftThreeQuartersBlock▕RightOneQuarterBlock🮈RightThreeEighthsBlock🮊RightThreeQuartersBlock▔UpperOneEighthBlock🮃UpperThreeEighthsBlock🮅UpperThreeQuartersBlock┄HorizontalLightDash┅HorizontalHeavyDash┈HorizontalLightDoubleDash┉HorizontalHeavyDoubleDash╌HorizontalLightTripleDash╍HorizontalHeavyTripleDash┆VerticalLightDash┇VerticalHeavyDash┊VerticalLightDoubleDash┋VerticalHeavyDoubleDash╎VerticalLightTripleDash╏VerticalHeavyTripleDash▘QuadrantUpperLeft▝QuadrantUpperRight▖QuadrantLowerLeft▗QuadrantLowerRight▀UpperHalf▄LowerHalf▌LeftHalf▐RightHalf░LightShade▒MediumShade▓DarkShade█FullBlock╬- DoubleCross╠- DoubleVerticalRight╣- DoubleVerticalLeft╦- DoubleHorizontalDown╩- DoubleHorizontalUp╫- VerticalDoubleAndHorizontalSingle╓- DownDoubleAndRightSingle╖- DownDoubleAndLeftSingle╟- VerticalDoubleAndRightSingle╢- VerticalDoubleAndLeftSingle╞- VerticalSingleAndRightDouble╡- VerticalSingleAndLeftDouble╒- DownSingleAndRightDouble╕- DownSingleAndLeftDouble┏- HeavyDownAndRight┓- HeavyDownAndLeft┗- HeavyUpAndRight┛- HeavyUpAndLeft┣- HeavyVerticalAndRight┫- HeavyVerticalAndLeft┳- HeavyHorizontalAndDown┻- HeavyHorizontalAndUp╋- HeavyCross┍- LightDownAndHeavyRight┑- LightDownAndHeavyLeft┎- HeavyDownAndLightRight┒- HeavyDownAndLightLeft┕- LightUpAndHeavyRight┙- LightUpAndHeavyLeft┖- HeavyUpAndLightRight┚- HeavyUpAndLightLeft▅- LowerFiveEighthsBlock▆- LowerThreeQuartersBlock▇- LowerSevenEighthsBlock▚- QuadrantUpperLeftAndLowerLeft▞- QuadrantUpperLeftAndLowerRight▟- QuadrantUpperRightAndLowerLeft▙- QuadrantUpperRightAndLowerRight🬁- SextantUpperLeft🬂- SextantUpperMiddle🬃- SextantUpperRight🬄- SextantLowerLeft🬅- SextantLowerMiddle🬆- SextantLowerRight🬉- SeparatedSextantUpperLeft🬊- SeparatedSextantUpperMiddle🬋- SeparatedSextantUpperRight🬌- SeparatedSextantLowerLeft🬍- SeparatedSextantLowerMiddle🬎- SeparatedSextantLowerRight🬓- SeparatedQuadrantUpperLeft🬔- SeparatedQuadrantUpperRight🬕- SeparatedQuadrantLowerLeft🬖- SeparatedQuadrantLowerRight╱- DiagonalRisingBar╲- DiagonalFallingBar╳- DiagonalCrossPowerlineLeftSolidPowerlineRightSolidPowerlineLeftHollowPowerlineRightHollowPowerlineCurvedRightSolidPowerlineCurvedRightHollowPowerlineCurvedLeftSolidPowerlineCurvedLeftHollow\ue0b8PowerlineLowerLeftTriangle\ue0b9PowerlineBackslashSeparator\ue0baPowerlineLowerRightTriangle\ue0bbPowerlineForwardslashSeparator\ue0bcPowerlineUpperLeftTriangle\ue0bdPowerlineForwardslashSeparatorRedundant\ue0bePowerlineUpperRightTriangle\ue0bfPowerlineBackslashSeparatorRedundant⠀BrailleBlank⠁BrailleDots1⠂BrailleDots2⠃BrailleDots12⠄BrailleDots3⠅BrailleDots13⠆BrailleDots23⠇BrailleDots123⠈BrailleDots4⠉BrailleDots14⠊BrailleDots24⠋BrailleDots124⠌BrailleDots34⠍BrailleDots134⠎BrailleDots234⠏BrailleDots1234⠐BrailleDots5⠑BrailleDots15⠒BrailleDots25⠓BrailleDots125⠔BrailleDots35⠕BrailleDots135⠖BrailleDots235⠗BrailleDots1235⠘BrailleDots45⠙BrailleDots145⠚BrailleDots245⠛BrailleDots1245⠜BrailleDots345⠝BrailleDots1345⠞BrailleDots2345⠟BrailleDots12345⠠BrailleDots6⠡BrailleDots16⠢BrailleDots26⠣BrailleDots126⠤BrailleDots36⠥BrailleDots136⠦BrailleDots236⠧BrailleDots1236⠨BrailleDots46⠩BrailleDots146⠪BrailleDots246⠫BrailleDots1246⠬BrailleDots346⠭BrailleDots1346⠮BrailleDots2346⠯BrailleDots12346⠰BrailleDots56⠱BrailleDots156⠲BrailleDots256⠳BrailleDots1256⠴BrailleDots356⠵BrailleDots1356⠶BrailleDots2356⠷BrailleDots12356⠸BrailleDots456⠹BrailleDots1456⠺BrailleDots2456⠻BrailleDots12456⠼BrailleDots3456⠽BrailleDots13456⠾BrailleDots23456⠿BrailleDots123456⡀BrailleDots7⡁BrailleDots17⡂BrailleDots27⡃BrailleDots127⡄BrailleDots37⡅BrailleDots137⡆BrailleDots237⡇BrailleDots1237⡈BrailleDots47⡉BrailleDots147⡊BrailleDots247⡋BrailleDots1247⡌BrailleDots347⡍BrailleDots1347⡎BrailleDots2347⡏BrailleDots12347⡐BrailleDots57⡑BrailleDots157⡒BrailleDots257⡓BrailleDots1257⡔BrailleDots357⡕BrailleDots1357⡖BrailleDots2357⡗BrailleDots12357⡘BrailleDots457⡙BrailleDots1457⡚BrailleDots2457⡛BrailleDots12457⡜BrailleDots3457⡝BrailleDots13457⡞BrailleDots23457⡟BrailleDots123457⡠BrailleDots67⡡BrailleDots167⡢BrailleDots267⡣BrailleDots1267⡤BrailleDots367⡥BrailleDots1367⡦BrailleDots2367⡧BrailleDots12367⡨BrailleDots467⡩BrailleDots1467⡪BrailleDots2467⡫BrailleDots12467⡬BrailleDots3467⡭BrailleDots13467⡮BrailleDots23467⡯BrailleDots123467⡰BrailleDots567⡱BrailleDots1567⡲BrailleDots2567⡳BrailleDots12567⡴BrailleDots3567⡵BrailleDots13567⡶BrailleDots23567⡷BrailleDots123567⡸BrailleDots4567⡹BrailleDots14567⡺BrailleDots24567⡻BrailleDots124567⡼BrailleDots34567⡽BrailleDots134567⡾BrailleDots234567⡿BrailleDots1234567⢀BrailleDots8⢁BrailleDots18⢂BrailleDots28⢃BrailleDots128⢄BrailleDots38⢅BrailleDots138⢆BrailleDots238⢇BrailleDots1238⢈BrailleDots48⢉BrailleDots148⢊BrailleDots248⢋BrailleDots1248⢌BrailleDots348⢍BrailleDots1348⢎BrailleDots2348⢏BrailleDots12348⢐BrailleDots58⢑BrailleDots158⢒BrailleDots258⢓BrailleDots1258⢔BrailleDots358⢕BrailleDots1358⢖BrailleDots2358⢗BrailleDots12358⢘BrailleDots458⢙BrailleDots1458⢚BrailleDots2458⢛BrailleDots12458⢜BrailleDots3458⢝BrailleDots13458⢞BrailleDots23458⢟BrailleDots123458⢠BrailleDots68⢡BrailleDots168⢢BrailleDots268⢣BrailleDots1268⢤BrailleDots368⢥BrailleDots1368⢦BrailleDots2368⢧BrailleDots12368⢨BrailleDots468⢩BrailleDots1468⢪BrailleDots2468⢫BrailleDots12468⢬BrailleDots3468⢭BrailleDots13468⢮BrailleDots23468⢯BrailleDots123468⢰BrailleDots568⢱BrailleDots1568⢲BrailleDots2568⢳BrailleDots12568⢴BrailleDots3568⢵BrailleDots13568⢶BrailleDots23568⢷BrailleDots123568⢸BrailleDots4568⢹BrailleDots14568⢺BrailleDots24568⢻BrailleDots124568⢼BrailleDots34568⢽BrailleDots134568⢾BrailleDots234568⢿BrailleDots1234568⣀BrailleDots78⣁BrailleDots178⣂BrailleDots278⣃BrailleDots1278⣄BrailleDots378⣅BrailleDots1378⣆BrailleDots2378⣇BrailleDots12378⣈BrailleDots478⣉BrailleDots1478⣊BrailleDots2478⣋BrailleDots12478⣌BrailleDots3478⣍BrailleDots13478⣎BrailleDots23478⣏BrailleDots123478⣐BrailleDots578⣑BrailleDots1578⣒BrailleDots2578⣓BrailleDots12578⣔BrailleDots3578⣕BrailleDots13578⣖BrailleDots23578⣗BrailleDots123578⣘BrailleDots4578⣙BrailleDots14578⣚BrailleDots24578⣛BrailleDots124578⣜BrailleDots34578⣝BrailleDots134578⣞BrailleDots234578⣟BrailleDots1234578⣠BrailleDots678⣡BrailleDots1678⣢BrailleDots2678⣣BrailleDots12678⣤BrailleDots3678⣥BrailleDots13678⣦BrailleDots23678⣧BrailleDots123678⣨BrailleDots4678⣩BrailleDots14678⣪BrailleDots24678⣫BrailleDots124678⣬BrailleDots34678⣭BrailleDots134678⣮BrailleDots234678⣯BrailleDots1234678⣰BrailleDots5678⣱BrailleDots15678⣲BrailleDots25678⣳BrailleDots125678⣿BrailleDots12345678⣸BrailleDots45678⣴BrailleDots35678⣼BrailleDots345678⣾BrailleDots2345678⣷BrailleDots1235678⣵BrailleDots135678⣽BrailleDots1345678⣻BrailleDots1245678⣹BrailleDots145678⣺BrailleDots245678- Sextants characters
- Octants characters
hints
The hints system allows you to quickly interact with text patterns in your terminal by displaying keyboard shortcuts over matching content. When activated, Rio scans the visible terminal content for configured patterns and displays keyboard shortcuts over each match.
For detailed information about the hints system, see the Hints feature documentation.
Basic Configuration
[hints]
# Characters used for hint labels
alphabet = "jfkdls;ahgurieowpq"

# URL hint example
[[hints.rules]]
regex = "(https://|http://)[^\u{0000}-\u{001F}\u{007F}-\u{009F}<>\"\\s{-}\\^⟨⟩`\\\\]+"
hyperlinks = true
post-processing = true
persist = false

[hints.rules.action]
command = "xdg-open"  # Linux/BSD
# command = "open"    # macOS
# command = { program = "cmd", args = ["/c", "start", ""] }  # Windows

[hints.rules.binding]
key = "O"
mods = ["Control", "Shift"]
Configuration Options
alphabet: String of characters used for hint labelsregex: Regular expression pattern to matchhyperlinks: Whether to treat matches as hyperlinkspost-processing: Apply post-processing to clean up matched textpersist: Keep hint mode active after selection
Actions
Built-in actions:
"Copy"- Copy to clipboard"Paste"- Paste the matched text"Select"- Select the matched text
External commands:
[hints.rules.action]
command = "xdg-open"  # Simple command
# Or with arguments:
command = { program = "code", args = ["--goto"] }
Key Bindings and Mouse Support
[hints.rules.binding]
key = "O"
mods = ["Control", "Shift"]

[hints.rules.mouse]
enabled = true
mods = ["Control"]  # Optional modifier keys
ignore-selection-foreground-color
Default is false
ignore-selection-foreground-color = false
keyboard
-
disable-ctlseqs-alt- Disable ctlseqs with ALT keys- Useful for example if you would like Rio to replicate Terminal.app, since it does not deal with ctlseqs with ALT keys
-
ime-cursor-positioning- Enable IME cursor positioning (default:true)- When enabled, IME input popups (like emoji picker, character viewer, or CJK input methods) will appear precisely at the cursor position
- Improves input experience for languages that require IME (Chinese, Japanese, Korean, etc.)
- Automatically updates position when cursor moves via keyboard, mouse, or any other method
- Set to
falseto use system default IME positioning behavior
Example:
[keyboard]
disable-ctlseqs-alt = false
ime-cursor-positioning = true
line-height
Default is 1.0.
Note: It cannot be settled as any value under 1.0.
line-height = 1.5

hide-mouse-cursor-when-typing
Default is false
hide-mouse-cursor-when-typing = false
navigation
navigation.mode
Rio has multiple styles of showing navigation/tabs.
Tab
Tab is the default navigation mode.
Usage:
[navigation]
mode = "Tab"
NativeTab (MacOS only)

Usage:
[navigation]
mode = "NativeTab"
Plain
Plain navigation mode will simply turn off any tab key binding.
This mode is perfect if you use Rio terminal with tmux or zellij.
Usage:
[navigation]
mode = "Plain"
navigation.use-split
Enable split feature. It is enabled by default.
[navigation]
use-split = true
navigation.unfocused-split-opacity
The opacity level (opposite of transparency) of an unfocused split. Unfocused splits are faded out by default to make it easier to see which split is focused. To disable this feature, set this value to 1.
A value of 1 is fully opaque and a value of 0 is fully transparent. Because 0 is not useful (it makes the split look very weird), the minimum value is 0.15. A value outside of 0.15..=1 is clamped to the nearest valid value.
Default is 0.7.
[navigation]
unfocused-split-opacity = 0.7
navigation.unfocused-split-fill
The color used to dim an unfocused split. Unfocused splits are dimmed by rendering a semi-transparent rectangle over the split; this option sets the color of that rectangle. The alpha of the overlay is derived from navigation.unfocused-split-opacity — this field is an RGB tint only.
Defaults to the terminal's background color. Specified as a hex string (#RRGGBB or RRGGBB).
[navigation]
unfocused-split-fill = "#000000"
navigation.open-config-with-split
Enable split for open configuration file.
navigation.hide-if-single
The property hide-if-single hides navigation UI if there is only one tab. It does not work for NativeTab.
Default is true.
[navigation]
hide-if-single = true
navigation.current-working-directory
Use same path whenever a new tab is created (Note: requires use-fork to be set to false).
option-as-alt
This config only works on MacOS.
Possible choices: both, left and right.
option-as-alt = 'left'
padding
Define outer padding around the entire window/tab area using CSS-like syntax (default is [10])
# Apply 10px to all sides
padding = [10]

# top and bottom: 10px, right and left: 5px
padding = [10, 5]

# top: 10px, right: 5px, bottom: 15px, left: 20px
padding = [10, 5, 15, 20]
panel
Configure panel layout when using splits (vertical/horizontal terminal splits).
panel.padding
Define inner padding inside each panel (around terminal content). Default is [5]
[panel]
# Apply 5px padding inside all panels
padding = [5]

# Different padding: top/bottom: 10px, left/right: 5px
padding = [10, 5]
panel.row-gap
Define vertical spacing between panels when split vertically (down). Default is 0
[panel]
row-gap = 10  # 10px vertical gap between panels
panel.column-gap
Define horizontal spacing between panels when split horizontally (right). Default is 0
[panel]
column-gap = 15  # 15px horizontal gap between panels
panel.border-width
Define the border width around each panel. Default is 2.0
[panel]
border-width = 2.0  # 2px border around panels
panel.border-radius
Define the corner radius for panel borders. Default is 0.0 (sharp corners).
[panel]
border-radius = 8.0  # 8px rounded corners
Full panel example
[panel]
padding = [5]       # Inner padding inside each panel
row-gap = 10        # Vertical gap when split down
column-gap = 15     # Horizontal gap when split right
border-width = 2.0  # Border width around panels
border-radius = 0.0 # Corner radius (0 = sharp)
platform
Rio allows you to have different configurations per OS. You can override Shell, Navigation, Renderer, Window, env-vars, and theme on a per-platform basis.
Field-Level Merging
Platform overrides use field-level merging for Window, Navigation, and Renderer configurations. This means you only need to specify the fields you want to override - other fields will be preserved from the global configuration.
Example (only overriding window mode and opacity):
[window]
width = 1024
height = 768
opacity = 0.75
blur = true

[platform]
# On macOS, only override the mode - width, height, opacity, and blur are preserved
macos.window.mode = "Maximized"
Shell Configuration
Shell configuration uses complete replacement - if you specify a platform-specific shell, you must provide the complete shell configuration:
[shell]
program = "/bin/fish"
args = ["--login"]

[platform]
# Shell is completely replaced on Windows
windows.shell = { program = "pwsh", args = ["-l"] }

# Shell is completely replaced on Linux
linux.shell = { program = "tmux", args = ["new-session", "-c", "/var/www"] }
Platform-Specific Environment Variables
You can define platform-specific environment variables that are appended to your global env-vars:
env-vars = ["GLOBAL_VAR=value"]

[platform]
macos.env-vars = ["MACOS_SPECIFIC=yes"]
linux.env-vars = ["LINUX_SPECIFIC=yes"]
windows.env-vars = ["WINDOWS_SPECIFIC=yes"]
Platform-Specific Themes
Override the theme on specific platforms:
theme = "lucario"

[platform]
macos.theme = "dracula"
linux.theme = "nord"
Complete Example
# Global configuration
theme = "default"
env-vars = ["EDITOR=vim"]

[window]
width = 1024
height = 768
opacity = 0.9

[shell]
program = "/bin/bash"
args = ["--login"]

[platform]
# macOS: Override only specific fields
macos.theme = "dracula"
macos.env-vars = ["HOMEBREW_PREFIX=/opt/homebrew"]
macos.window.opacity = 1.0  # Other window fields preserved
macos.renderer.backend = "Metal"
macos.shell = { program = "/bin/zsh", args = ["-l"] }

# Linux: Different overrides
linux.window.mode = "Maximized"
linux.renderer.backend = "Vulkan"

# Windows: Complete customization
windows.theme = "nord"
windows.env-vars = ["WINDOWS_VAR=value"]
windows.shell = { program = "pwsh", args = ["-NoLogo"] }
renderer.backend
Selects the rendering backend. Sugarloaf ships native backends for Metal (macOS) and Vulkan (Linux); the Webgpu backend goes through wgpu and requires Rio to be built with the wgpu Cargo feature (see Build from source).
Metal(default on macOS): native Metal backend. Smaller, skips the wgpu translation layer. Does not support RetroArch filters.Vulkan(default on Linux): native Vulkan backend on Linux; wgpu Vulkan on other platforms.Webgpu(default elsewhere): wgpu umbrella backend — wgpu picks the best available native API (Metal / Vulkan / DX12 / GL / WebGPU). Required to use RetroArch filters.
[renderer]
backend = "Webgpu"
Selecting
Webgpu, orVulkanon a non-Linux platform, requires building with--features wgpu. The native Metal and native Vulkan backends do not include the librashader filter chain — seerenderer.filterbelow.
renderer.disable-unfocused-render
This property disable renderer processes while Rio is unfocused.
Default is false.
[renderer]
disable-unfocused-render = false
renderer.disable-occluded-render
This property disables renderer processes while Rio windows/tabs are occluded (completely hidden from view). This is different from unfocused rendering as it depends on whether the window is minimized, set invisible, or fully occluded by another window.
When a window becomes visible again after being occluded, Rio will automatically render one frame to update the display.
Default is true.
[renderer]
disable-occluded-render = true
renderer.target-fps
This configuration is disabled by default but if isLimits the maximum number of frames per second that rio terminal will attempt to draw on a specific frame per second interval.
[renderer]
target-fps = 120
renderer.filter
Rio allow to configure filters based on RetroArch shaders: github.com/libretro/slang-shaders.
Builtin filters:
newpixiecrt.fubax_vr.
Note: filters require Rio to be built with the wgpu Cargo feature and the Webgpu backend. They do not run on the native Metal (macOS) or native Vulkan (Linux) backends. See RetroArch shaders for details.
[renderer]
filters = [
  # Loads built-in crt
  "NewPixieCrt",

  # Or from a specific path
  "/Users/raphael/Downloads/slang-shaders-master/crt/newpixie-crt.slangp"
]

renderer.strategy
Strategy property defines how Rio will render, by default it follows Event driven (Events), but you can change it to a continuous loop (that will consume more CPU) by changing to Game.
[renderer]
strategy = "events"
renderer.use-cpu
Use the CPU rasterizer (tiny-skia) instead of the GPU pipeline. Useful on systems without working GPU drivers, in virtual machines, or for debugging rendering issues.
This option is experimental. The first version supports solid quads and glyphs only — the following features are not yet implemented on the CPU path:
- Image overlays (Kitty graphics protocol)
- GPU filters (RetroArch /
renderer.filters) - Advanced underline styles
- Corner radii
[renderer]
use-cpu = false
scroll
You can change how many lines are scrolled each time by setting this option. Scroll calculation for canonical mode will be based on lines = (accumulated scroll * multiplier / divider).
If you want a quicker scroll, keep increasing the multiplier. If you want to reduce scroll speed you will need to increase the divider.
You can combine both properties to find the best scroll for you.
- Multiplier default is
3.0. - Divider default is
1.0.
Example:
[scroll]
multiplier = 3.0
divider = 1.0
enable-scroll-bar
Show an overlay scroll bar when scrolling. The scroll bar appears on scroll and fades out after 2 seconds. It does not change the width of the content and works independently in each panel. The scroll bar is also draggable.
Default is true.
enable-scroll-bar = true
scrollback-history-limit
Maximum number of scrollback history lines retained per panel. Scrollback lets you scroll up to inspect command output that has moved off-screen.
- Raising this keeps more history available at the cost of memory proportional to the total number of cells held in the buffer.
- Setting it to
0disables scrollback entirely. - The alt-screen grid (used by full-screen TUIs like
vim,less,htop) never keeps scrollback regardless of this value.
Default is 10000.
scrollback-history-limit = 10000
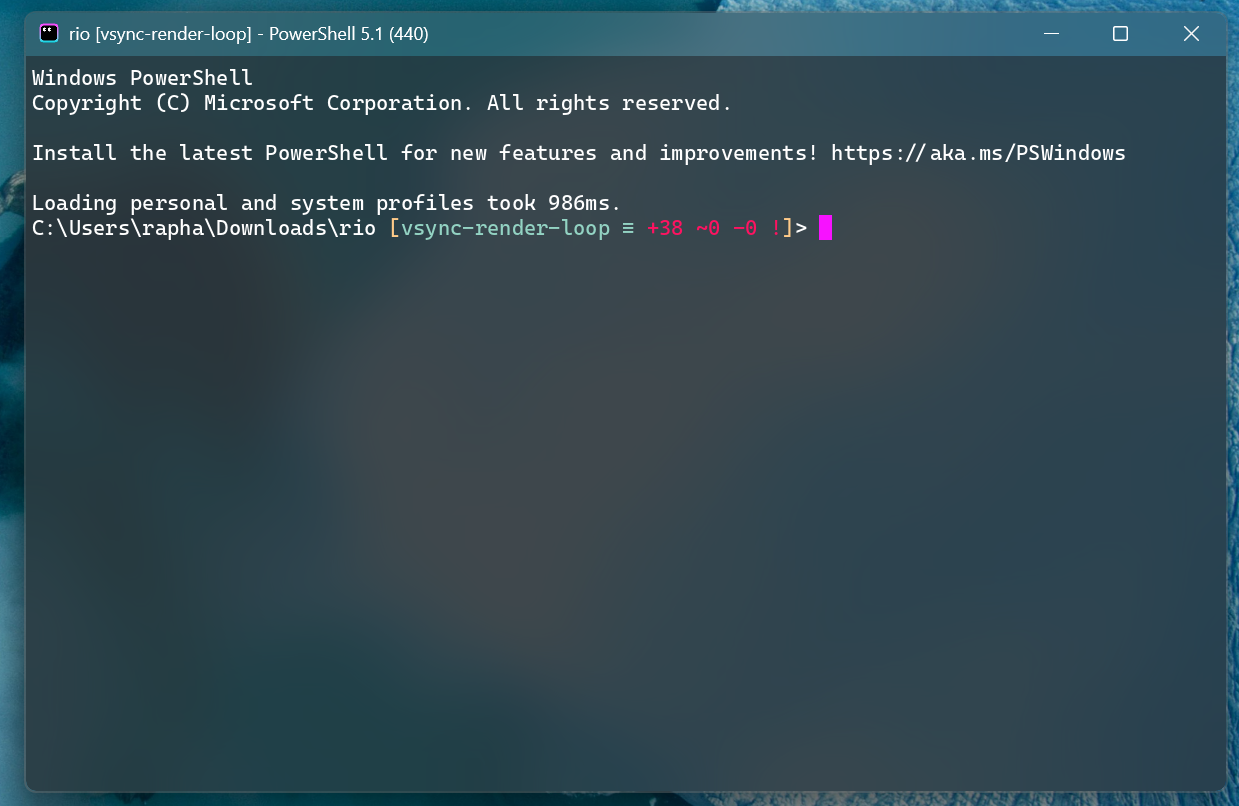
shell
You can set shell.program to the path of your favorite shell, e.g. /bin/fish.
Entries in shell.args are passed unmodified as arguments to the shell.
Default:
- (macOS) user login shell
- (Linux/BSD) user login shell
- (Windows) powershell
Shell Examples
- MacOS using fish shell from bin path:
[shell]
program = "/bin/fish"
args = ["--login"]
- Windows using powershell:
[shell]
program = "pwsh"
args = []
- Windows using powershell with login:
[shell]
program = "pwsh"
args = ["-l"]
- MacOS with tmux installed by homebrew:
[shell]
program = "/opt/homebrew/bin/tmux"
args = ["new-session", "-c", "/var/www"]
theme
The configuration property theme is used for specifying the theme. Rio will look in the themes folder for the theme.
You can see common paths for the themes directory here:
Note: Remember to replace "YOUR_USERNAME" with your actual user name.
| Platform | Path |
|---|---|
| Mac | /Users/YOUR_USERNAME/.config/rio/themes |
| Linux | /home/YOUR_USERNAME/.config/rio/themes |
| Windows | C:\Users\YOUR_USERNAME\AppData\Local\rio\themes |
In the example below, we will setup the Dracula theme for Rio. The theme can be downloaded from github.com/dracula/rio-terminal.
After downloading the dracula.toml file, move it inside the folder themes in the configuration folder.
#  ~/.config/rio/config.toml
theme = "dracula"
It should look like this:

Another option would be to install the Lucario color scheme for Rio terminal, by moving the downloaded file to ~/.config/rio/themes/lucario.toml and setting the theme property:
#  ~/.config/rio/config.toml
theme = "lucario"

You can find more than 250 themes for Rio terminal in this repository: mbadolato/iTerm2-Color-Schemes/tree/master/rio.
Building your own theme
Building your own theme for Rio is very straightforward.
Simply create a new theme file in your configuration themes folder (E.g. ~/.config/rio/themes/foobar.toml) and choose your preferred colors:
Note: Missing fields will use the default for Rio.
# ~/.config/rio/themes/foobar.toml

[colors]
background = ""
foreground = ""

# Selection
selection-background = ""
selection-foreground = ""

# Navigation
tabs = ""
tabs-active = ""
bar = ""
split = ""
cursor = ""
vi-cursor = ""

# Search
search-match-background = ""
search-match-foreground = ""
search-focused-match-background = ""
search-focused-match-foreground = ""

# Regular colors
black = ""
blue = ""
cyan = ""
green = ""
magenta = ""
red = ""
tabs = ""
white = ""
yellow = ""

# Dim colors
dim-black = ""
dim-blue = ""
dim-cyan = ""
dim-foreground = ""
dim-green = ""
dim-magenta = ""
dim-red = ""
dim-white = ""
dim-yellow = ""

# Light colors
light-black = ""
light-blue = ""
light-cyan = ""
light-foreground = ""
light-green = ""
light-magenta = ""
light-red = ""
light-white = ""
light-yellow = ""
After that all you have to do is set the theme property in your configuration file.
# ~/.config/rio/config.toml
theme = "foobar"
Proud of your new theme? Why not share it on the Rio Discord!
title.content
Configure window title using template.
Default on macOS/Linux: {{ title || relative_path }}
Default on Windows: {{ title || program }}
Note: Variables are not case sensitive.
Possible options:
TITLE: terminal title via OSC sequences for setting terminal titlePROGRAM: (e.gfish,zsh,bash,vim, etc...)ABSOLUTE_PATH: (e.g/Users/rapha/Documents/a/rio)RELATIVE_PATH: home-relative path, shortened when deep (e.g~/Documents/a/rioor…/a/psone/starpsx)COLUMNS: current columnsLINES: current lines
Example 1:
[title]
content = "{{ PROGRAM }} - {{ ABSOLUTE_PATH }}"
Result: fish - .../Documents/a/rio.
Example 2:
[title]
content = "{{ program }} ({{columns}}x{{lines}})"
Result: fish (85x23).
Example 3:
You can use || operator, in case the value is empty or non-existent it will use the following:
[title]
content = "{{ TITLE || RELATIVE_PATH }}"
In this case, TITLE is non-existent so will use RELATIVE_PATH.
Result: ~/Documents/a/rio
title.placeholder
Configure initial title.
[title]
placeholder = "▲"
use-fork
Defaults for POSIX-based systems (Windows is not configurable):
- MacOS: spawn processes
- Linux/BSD: fork processes
use-fork = false
window.width
Define the initial window width.
- Default:
600
Example:
[window]
width = 600
window.height
Define the initial window height.
- Default:
400
Example:
[window]
height = 400
window.columns
Define the initial number of columns. When set, this takes precedence over window.width.
- Default: not set
- Works independently from
window.rows(you can set only columns). - Invalid value
0is ignored and Rio falls back towindow.width.
Example:
[window]
columns = 80
window.rows
Define the initial number of rows. When set, this takes precedence over window.height.
- Default: not set
- Works independently from
window.columns(you can set only rows). - Invalid value
0is ignored and Rio falls back towindow.height.
Example:
[window]
rows = 24
window.mode
Define how the window will be created
Windowed(default) is based on width and heightMaximizedwindow is created with maximizedFullscreenwindow is created with fullscreen
Example:
[window]
mode = "Windowed"
window.opacity
Set window background opacity.
- Default:
1.0.
Example:
[window]
opacity = 0.5
window.opacity-cells
Apply window.opacity to cells that paint an explicit background color too, not just to the window's default background.
By default window.opacity only affects the window background — cells with an explicit SGR-set background color stay fully opaque. That preserves contrast on syntax-highlighted regions and on TUIs (Neovim, tmux, lazygit, …) that paint their own panel backgrounds, but it also means those tools can look fully opaque inside an otherwise translucent window.
Set this to true to apply the opacity multiplier to those cells as well, so the entire terminal — including TUI surfaces — shares the configured translucency.
Selection highlights, search highlights, and inverse-video cells stay fully opaque regardless of this flag.
- Default:
false.
Example:
[window]
opacity = 0.6
opacity-cells = true
window.blur
Background blur for the window. Accepts a bool or one of the macOS liquid-glass styles. Changing this setting requires restarting Rio to take effect.
false(default) — no blur.true— standard system blur (CGS backdrop on macOS, KWin blur on Wayland, DWM acrylic on Windows 11+)."macos-glass-regular"— macOS 26 (Tahoe) and later. Native liquid-glass effect with the regular style (some opacity)."macos-glass-clear"— macOS 26 and later. Native liquid-glass effect with the clear style (highly transparent).
The macOS glass values imply a translucent window the same way opacity < 1 does — the layer is flipped to non-opaque for you. On platforms or macOS versions where a glass style isn't available, Rio falls back to the standard system blur and logs a warning instead of failing.
[window]
blur = false
Using blur and background opacity:
[window]
opacity = 0.5
decorations = "enabled"
blur = true
macOS liquid glass:
[window]
opacity = 0.6
decorations = "transparent"
blur = "macos-glass-regular"


window.background-image
Set an image as the window background. The image is uploaded once into a dedicated GPU texture sized to the source dimensions and stretched to cover the full window.
- Default:
None
Fields
path— required, absolute path to a PNG/JPG/etc.opacity—0.0–1.0, default1.0. Multiplied into the image's alpha channel before upload, so a lower value lets the terminal background bleed through.
[window.background-image]
path = "/Users/hugoamor/Desktop/musashi.png"
opacity = 0.5

window.decorations
Set window decorations.
Enabled(default for Windows/Linux/BSD/macOS) enable window decorations.Disableddisable all window decorations.Transparentwindow decorations with transparency.Buttonlessremove buttons from window decorations.
Example:
[window]
decorations = "Enabled"
window.macos-use-unified-titlebar
You can use MacOS unified titlebar by config, it's disabled by default.
[window]
macos-use-unified-titlebar = false

window.macos-use-shadow
You can enable window shadow on MacOS by config, it's disabled by default.
[window]
macos-use-shadow = true
window.macos-traffic-light-position-x
Customize the horizontal position of macOS traffic light buttons (close, minimize, maximize). Position is specified in points from the left edge of the window.
Note: This setting is ignored when navigation mode is set to "Tab" as the traffic lights are positioned automatically for that mode.
[window]
macos-traffic-light-position-x = 9.0
window.macos-traffic-light-position-y
Customize the vertical position of macOS traffic light buttons (close, minimize, maximize). Position is specified in points from the top edge of the window.
Note: This setting is ignored when navigation mode is set to "Tab" as the traffic lights are positioned automatically for that mode.
[window]
macos-traffic-light-position-y = 9.0
window.windows-corner-preference
Describes how the corners of a Microsoft Windows window should look like.
Options: Default, DoNotRound,Round and RoundSmall
[window]
windows-corner-preference = "Round"
window.windows-use-undecorated-shadow
Microsoft Windows specific.
Shows or hides the background drop shadow for undecorated windows.
[window]
windows-use-undecorated-shadow = false
window.windows-use-no-redirection-bitmap
Microsoft Windows specific.
This sets WS_EX_NOREDIRECTIONBITMAP.
[window]
windows-use-no-redirection-bitmap = false
working-dir
Directory the shell is started in. If this is unset, the working directory of the parent process will be used.
This configuration only works if use-fork is disabled.
working-dir = '/Users/raphael/Documents/'